WOODTURNING WORKSHOP UPGRADE
- Jan 9, 2021
- 4 min read
Updated: Jan 25, 2021
Prior to building my current workshop, I was doing all of my woodturning out of the basement. And while that served my purposes at the time, it was far from ideal. There was limited space, poor lighting, and it was difficult to contain the dust. So when we decided to downsize last year, and knowing that my woodturning hobby was growing to something beyond that, we decided to build a dedicated space. This new shop is truly a dream come true and I feel extremely blessed! But having gone through the whole process of designing the space and setting it up, I thought it might be helpful to others to share my trials & tribulations along the way.


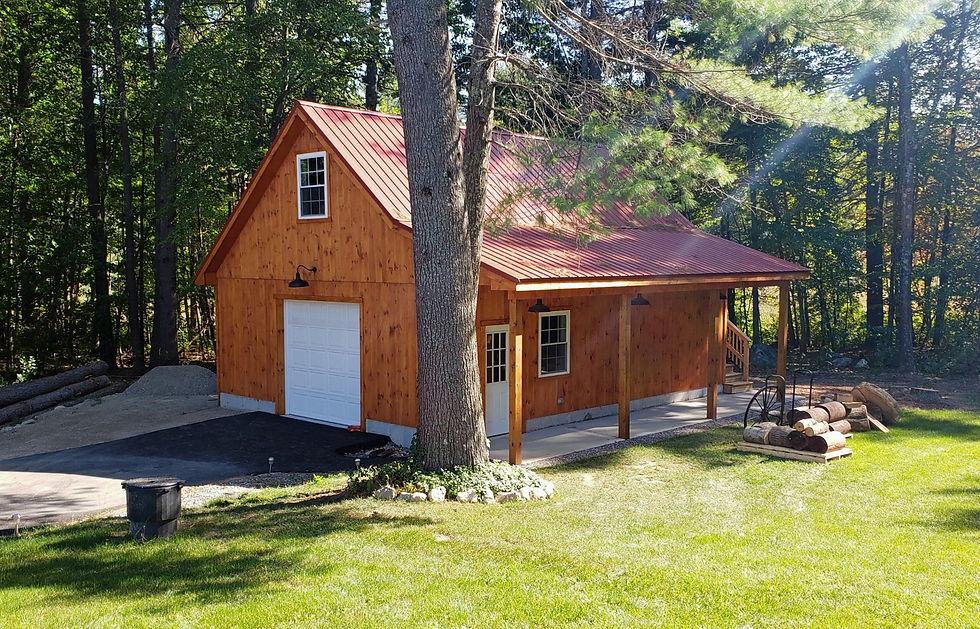
Construction on the new shop (what we affectionately call the "barn") started in November of 2019, and was completed in April of 2020. It took over twice as long as it was supposed to - nearly half a year - during which time I was completely without a space to turn. It was really quite torturous and now I know in the future, any such contracts that I might sign with a builder will have to have estimated timelines agreed to up front. But in the end, I was very happy with how it came out.
The footprint is 24' by 30' with a 5' overhang in front - which is very handy in the winter for storing overflow wood that doesn't fit in the shop. In retrospect, it still could have been bigger, but budgets being what they are this was as large as we could go. For minimal additional cost we were able to build a loft on the second story, and by putting the stairs on the outside of the building, I was able to save valuable floor space inside the shop. Eventually, I may convert that space into a gallery in which to display my wares, but it also functions nicely as a wood storage area. Most of the building process was outsourced, but we were able to save some $ by doing all of the electrical work - running the lines from house to barn, sub-panel, outlets, wiring, lighting - ourselves (with the help if a licensed electrician family member!) . And with some help from my brothers-in-law, we were also able to install the heat/AC ourselves.
I spend alot of time thinking through overall design for optimal workflow, and for the most part I'm very happy with the way it turned out. These were some of the key design choices:
Extended driveway leading right up to the garage door. This is very helpful when bringing in new logs for processing, and also moving equipment.
Garage door entry for moving equipment and large stock in and out
Plywood walls inside - so much better than drywall for hanging things on the wall, and it doesn't collect dust.
Metal liner panel ceiling - super clean, super bright
Metal roof - it's the only way to go
Finishing room (8' x 12') - it's really nice to have a 'clean' room which stays relatively dust-free for finishing.
9' ceilings give plenty of clearance and headroom, and better air circulation
Short distance to travel from blank-processing area outside, to inside.
Temperature/humidity control via Mini Split. This was such a great choice, and I'm super happy with it.
Windows - 5 full-sized ones in the main shop. In retrospect, if I had put in smaller windows up high, it would have given me more wall space for storage, but the light is nice.
Once the building process was completed, it was time to start setting up inside. It's surprising how fast the space fills up! Everything pretty much centers around the lathe, and I wanted to ensure an efficient workflow around the shop for the most common tasks. There were also several things that I definitely wanted:


Dust collection - Having spent several years in a dusty basement, I knew I had to have a better solution. I now have hard line dust collection at each of the primary dust-creating machines - lathe, bandsaw, and tablesaw.
Lighting - I went with 8' Barrina LED strips from Amazon and am very happy with them. They're economical, extremely bright, and at 5000K color rendering is pretty good. They're also super-light, and can daisy chain for easy installation. They light the space well, and paired with the natural light from the windows, and task lighting, it's plenty bright.
Compressed air - I don't know how I ever lived without this before! I bought a Quincy QT54 60-gallon, and ran 4 drops throughout the shop. The compressor is back in the finishing room which keeps noise to a minimum.
Working space - seems I can never have enough. I built 1 long bench to extend 24' along the interior wall, and it's still not enough. At 39" tall, it's also a comfortable working height for me. Eventually, I want to build an extension for the tablesaw which will provide some extra working room in the center of the shop.
Storage - The one thing I sadly underestimated was the amount of storage I need for turning blanks. Even with shelving and under-bench space, I still need more. Thankfully the upstairs loft does provide some overflow relief.
Climate control - We installed a Mitsubishi 24K MiniSplit with 2 blower units (one for each room). I love this thing. It's super efficient and quiet, and doesn't require any ductwork for installation. Plus, it has a humidity control setting which is a huge help in the finishing room. The only caution I'd mention is that mini splits don't have very good air filtration and with all the dust from a shop, you do have to take care about that. I actually installed an extra filter on top of each blower, and those seem to keep the worst of the dust from getting into the system itself.
All-in-all, I'm very very happy. At some point, I'd still like to paint the walls, and should the day come when I'm teaching out of this shop, I may have to re-arrange some but there is definitely enough room to accomodate that. If you have any questions or would like to discuss shop setup, please leave a comment below!

Comments